| View previous topic :: View next topic |
| Author |
Topic : "Texture Tutorial" |
Heysoos
member
Member #
Joined: 24 Mar 2004
Posts: 294
Location: the New Mexico
|
 Posted: Sat Sep 11, 2004 2:44 pm Posted: Sat Sep 11, 2004 2:44 pm |
 |
 |
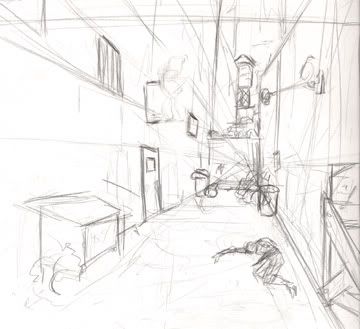
Hey, a few people have asked me how I do textures so I figured I'd make a bit of a tutorial for those who are interested. Its actually quite simple (and a little cheap  ) but quite effective. It is especially useful if you want a really organic texture like crumbling stone or weathered metal which can be pretty tough and time consuming to doodle out (especially when using a mouse like I do). This piece is a quick concept sketch for an adventure game location. Done in Photoshop ) but quite effective. It is especially useful if you want a really organic texture like crumbling stone or weathered metal which can be pretty tough and time consuming to doodle out (especially when using a mouse like I do). This piece is a quick concept sketch for an adventure game location. Done in Photoshop
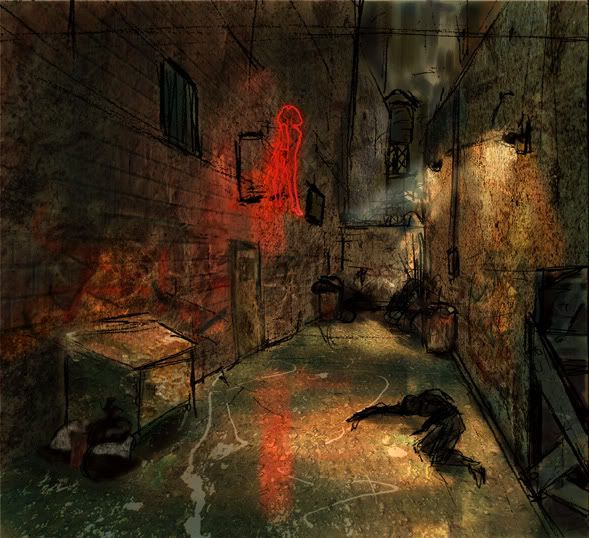
step 1: the sketch I scanned in
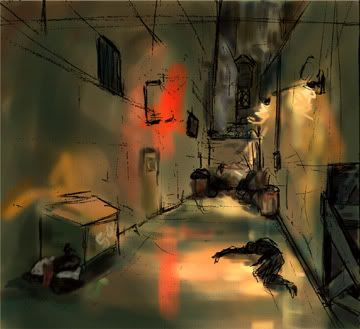
step 2:Step 2 and step 3 are actually done at the same time. Its good to switch back and fourth to see how they react together. This is basically your typical digital painting done under the sketch, which I won't go into as there are better tutorials about this. The only difference is that this is all done on an OVERLAY layer.
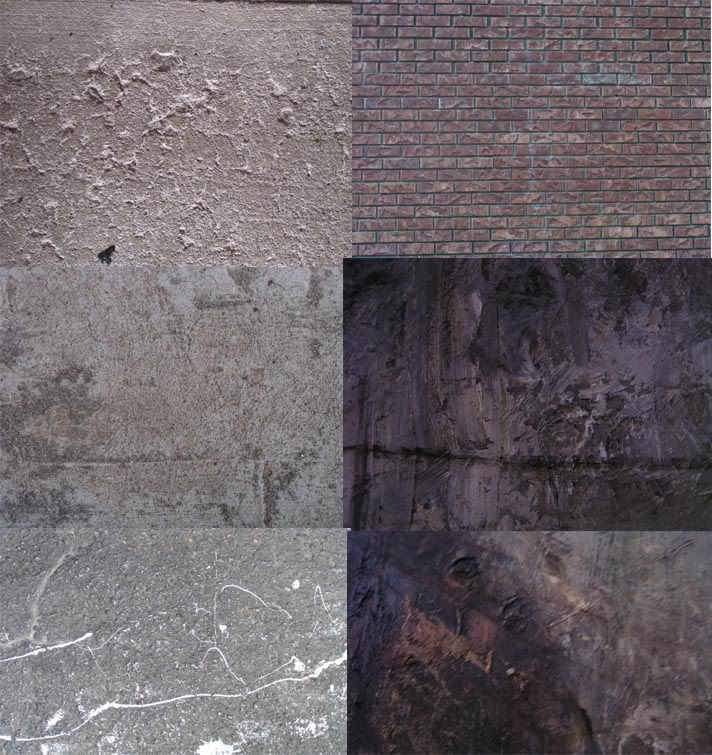
Step 3: I have an archive of various textures that I've photographed with a digital camera which I use in my work. When getting textures its important to make sure the camera is on the highest resoultion and size it can be on. This will give you more freedom in messing with the size and stretching of the textures. Here are the textures I used for this piece(reduced size):
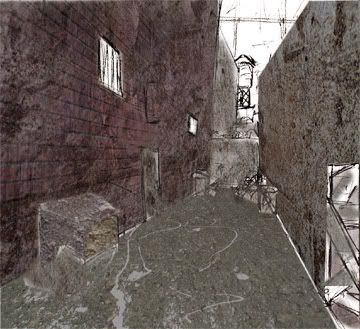
Then on a layer under the "painting overlay layer" you basically make a collage of the textures you want. I did various layering and messing around with the textures until I was happy with the way they looked.
Step 4: is just going back and fourth and tweaking and refining till the two layers look good together.
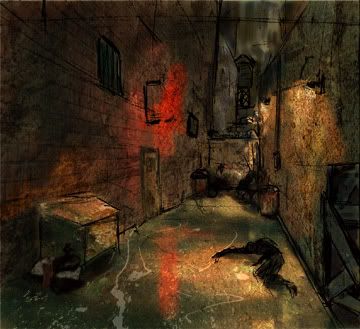
Step 5: then all I did was add a few details, like the sign and graffiti on the walls. And its finished. Well as finished as a concept sketch needs to be. If there were a final illustration Ideally I would refine it a lot more and take out the original sketch lines.
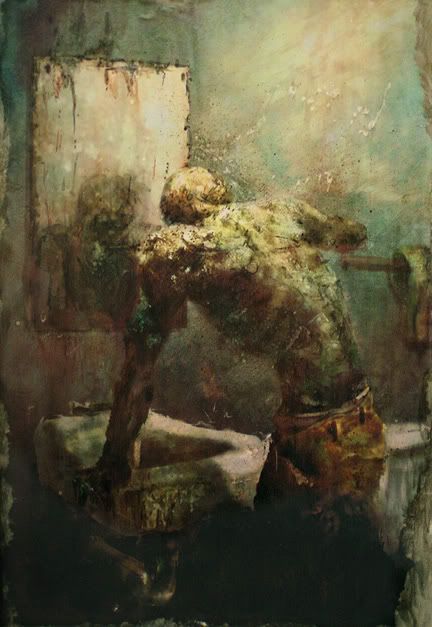
Here I used the technique in a pretty straightforward descriptive way. I also like to use it as a more stylistic expressionistic kind of technique to give a picture more energy, like here.
alright, thats my crappy tutorial. any comments?
[/img]
_________________
http://www.angelfire.com/art2/wfkeil |
|
| Back to top |
|
Warhead82
member
Member #
Joined: 24 Mar 2004
Posts: 210
Location: Canada B.C
|
| Posted: Sat Sep 11, 2004 9:17 pm |
|
|
i like this tutorial, it is quick and straight to the point thanks.
_________________
When you look at a blank canvas or drawing paper, it stares you in the eyes and thinks it can beat you.~ Justin Beckett |
|
| Back to top |
|
cok3
member
Member #
Joined: 17 Jul 2003
Posts: 131
Location: Kuala Lumpur, Malaysia
|
| Posted: Tue Sep 14, 2004 4:58 pm |
|
|
| thanks for the tutorial Heysoos, hope i can see more texture tutorials in the forum. this was great. |
|
| Back to top |
|
|


