| View previous topic :: View next topic |
| Author |
Topic : "The making of a giant robot. ( now with small tutorials )" |
Chris-Mayernik
member
Member #
Joined: 24 Feb 2004
Posts: 182
Location: USA
|
 Posted: Tue May 31, 2005 2:37 pm Posted: Tue May 31, 2005 2:37 pm |
 |
 |
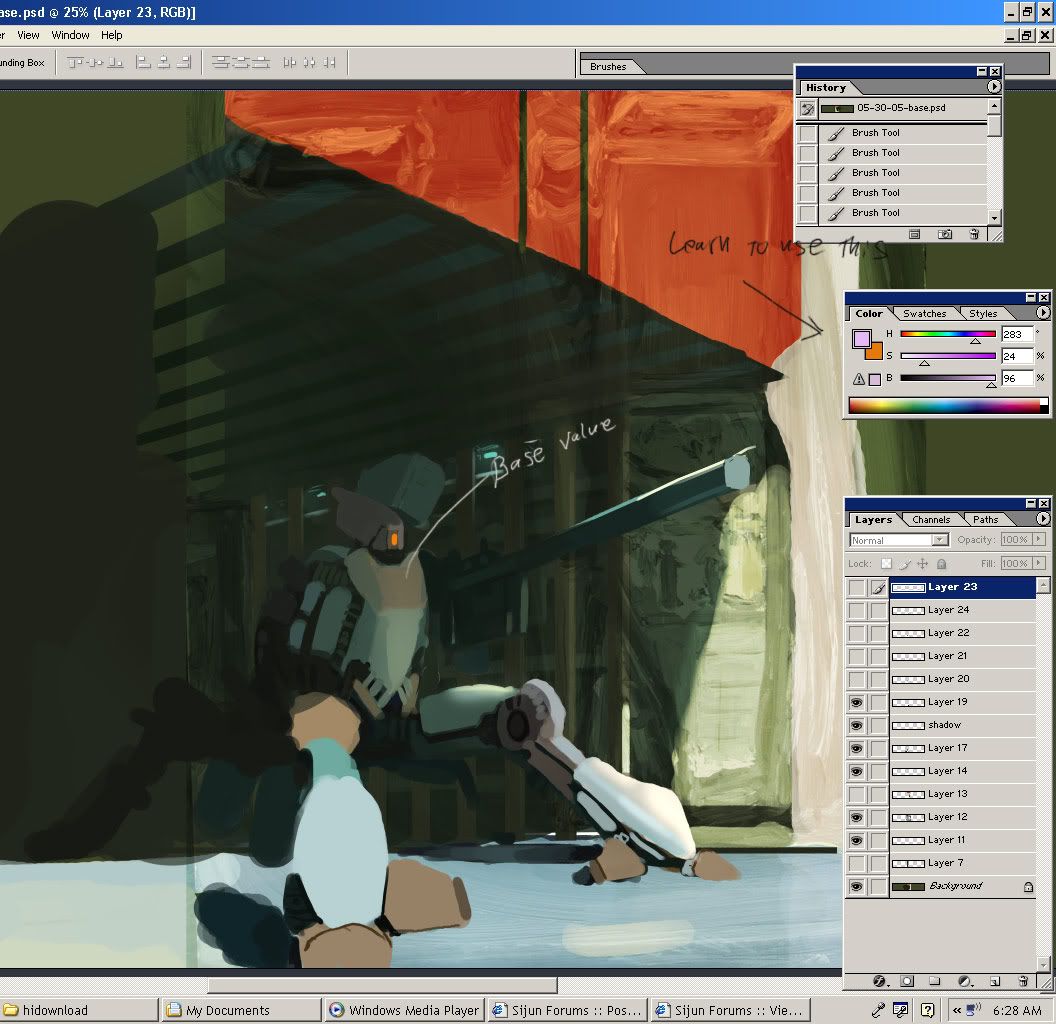
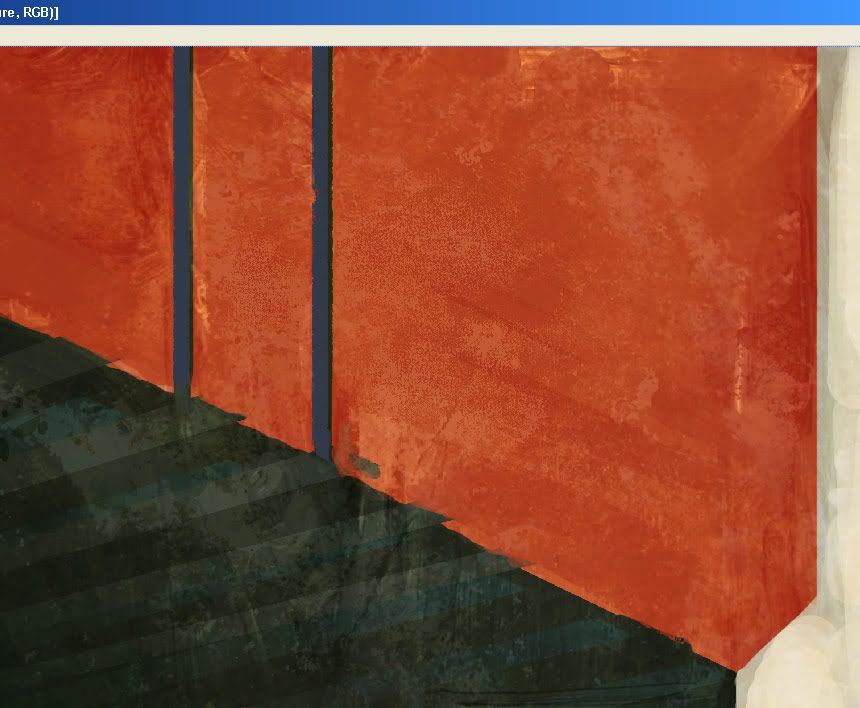
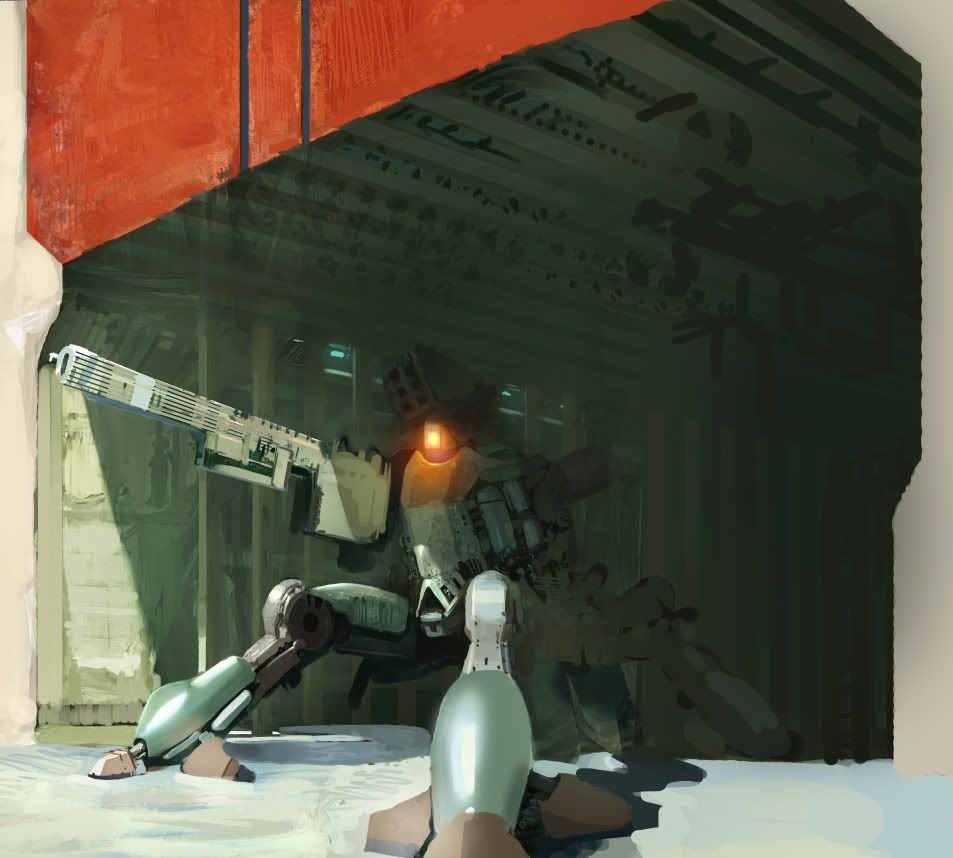
This started as a speed painting but since I've been studying highlights and shadows so much lately I thought I'd finish it. I must say it's a pretty boring picture, I'l try to make it a little more pleasing in the end. feel free to comment or ask questions.
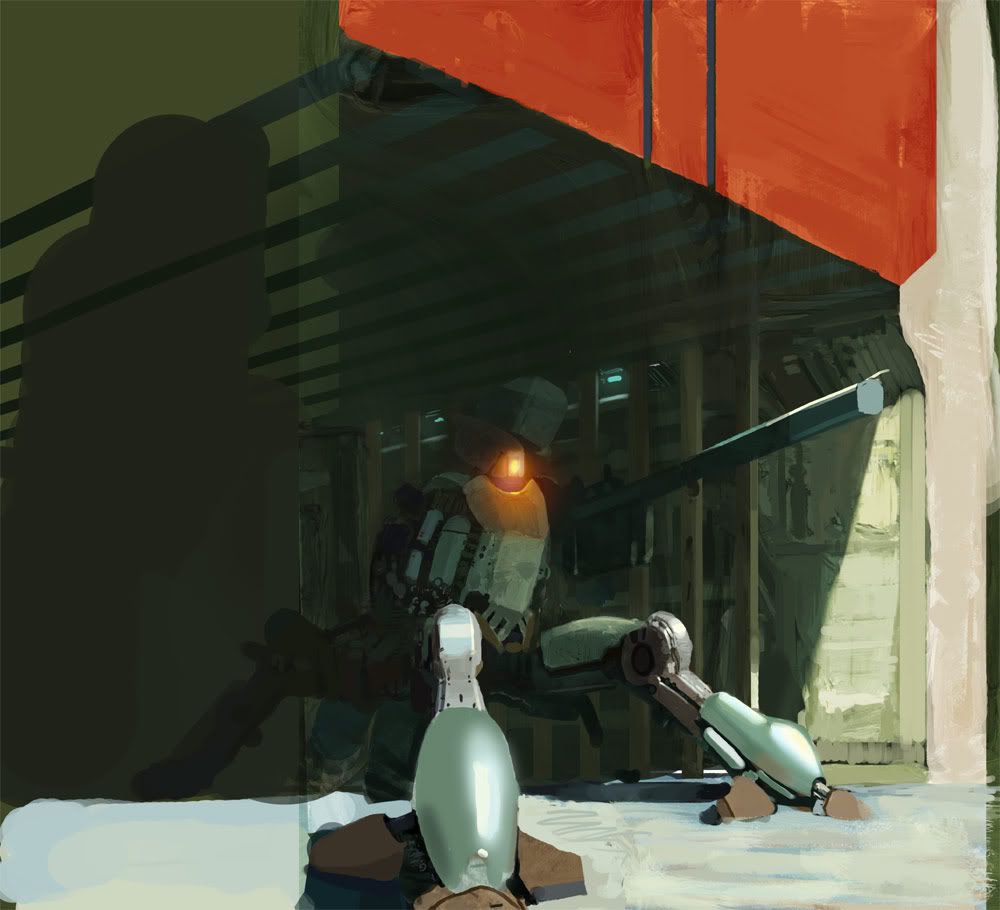
speed painting
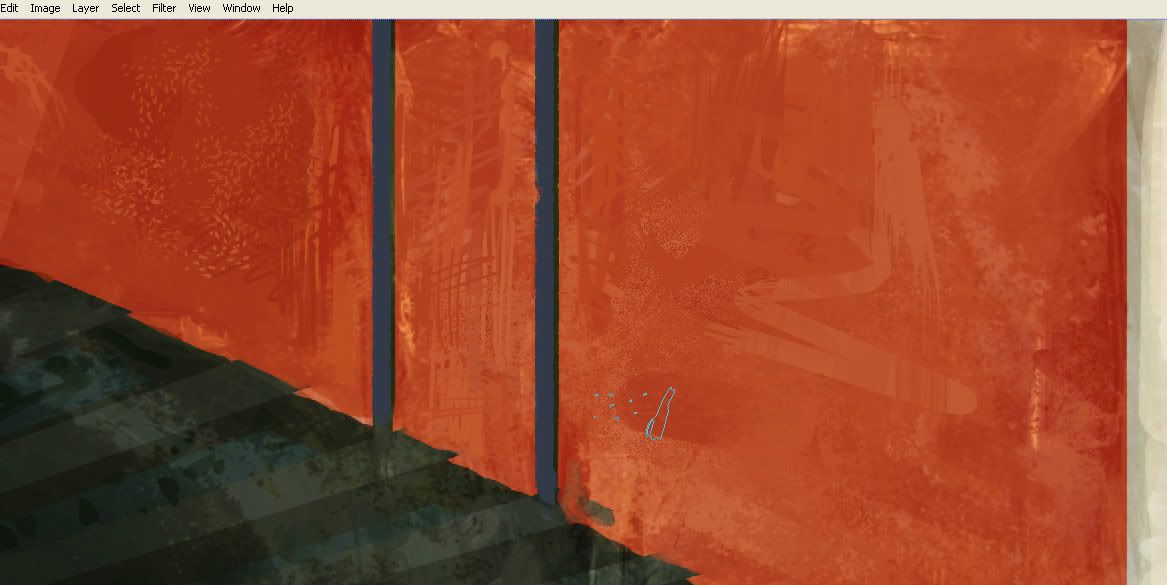
where I am now
Last edited by Chris-Mayernik on Wed Jun 01, 2005 4:08 pm; edited 1 time in total |
|
| Back to top |
|
Nicol�s Uribe
junior member
Member #
Joined: 15 May 2005
Posts: 15
Location: Colombia
|
| Posted: Tue May 31, 2005 3:12 pm |
|
|
cool man... thanks!! it helps to see you guys do it step by step!
_________________
i like to paint...
www.uribearts.com |
|
| Back to top |
|
Naeem
member
Member #
Joined: 13 Oct 2004
Posts: 1222
Location: USA
|
| Posted: Tue May 31, 2005 3:41 pm |
|
|
yeah, thanks chris. the robot's looking killer. u taught me something of great value; that color picker on the right. i never realized it was there before, lol. i always did it manually, which is a bit harder.
anyway, keep posting more!
beautiful so far |
|
| Back to top |
|
Godwin
member
Member #
Joined: 24 Apr 2002
Posts: 701
Location: Singapore
|
| Posted: Tue May 31, 2005 6:00 pm |
|
|
Somehow I find the colour picker thing to be quite un-user-friendly, unlike Painter's circular palette, which is much much easier to use. But of course, using this in HSV can give you the proper value of the colour you want.
Btw, how did you get the painterly texture in the orange area originally?
_________________
Derelict Studios|Godwin's Space |
|
| Back to top |
|
Chris-Mayernik
member
Member #
Joined: 24 Feb 2004
Posts: 182
Location: USA
|
| Posted: Tue May 31, 2005 6:17 pm |
|
|
I'm glad you asked Godwin. in a couple minutes I will post my process and pretty much the reason I use textures.
Edit: OH yes the paint textures. Well, I took pictures of some of my oil paintings and overlayed those just like I did with the texture in my tutorial below.
Last edited by Chris-Mayernik on Tue May 31, 2005 6:57 pm; edited 1 time in total |
|
| Back to top |
|
Chris-Mayernik
member
Member #
Joined: 24 Feb 2004
Posts: 182
Location: USA
|
| Posted: Tue May 31, 2005 6:53 pm |
|
|
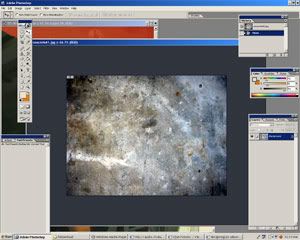
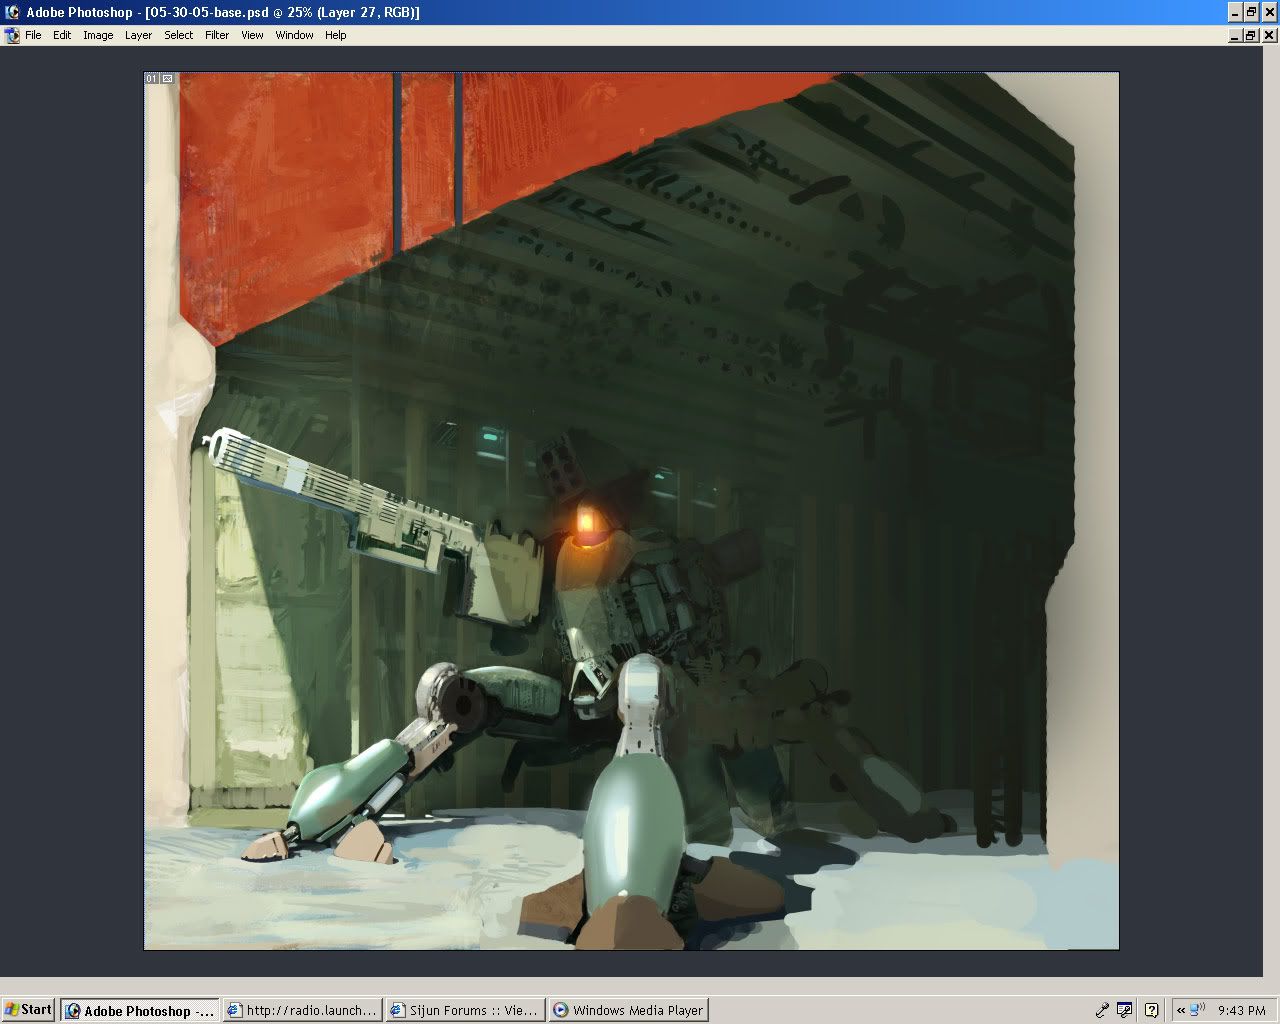
Small texture tutorial
1
Here is the surface I am going texture. I auctually textured it earlier but I am going to add some more just to show you how to do it.
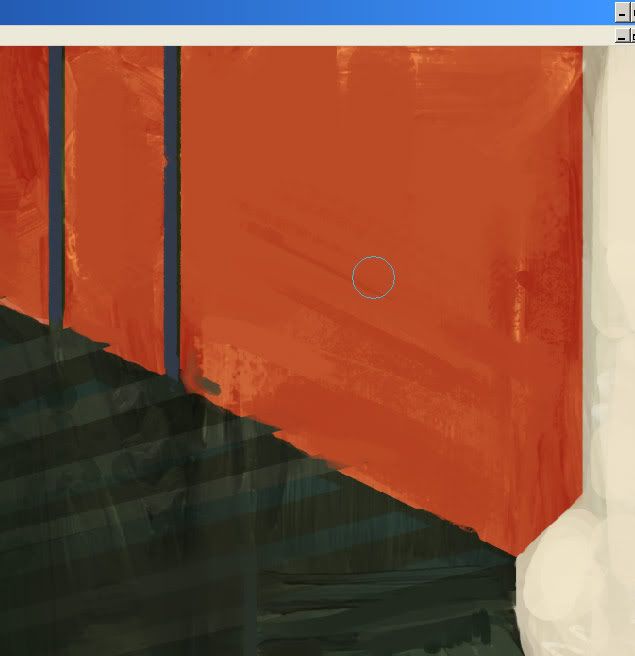
2
After finding a good texture that you would like to use bring that into your photoshop file. honestly it does not really matter what texture you use so be open to using anything. I chose some beat up contrete.
3
Once getting the texture into photoshop I adjust the levels on it so the darks are more defined. Go to image/adjustments/levels
now I the textures layer mode to soft light and change the layers opacity to 25. Create a new layer above the texture layer to paint on.
4
My custom brush tutorial http://www.idigitalemotion.com/tutorials/guest/custombrush/custombrush.html
( keep in mind that the value you paint the custom brush with will be the value it paints at when used )
Now use some customs brushes if you have any and if now create some or just use any of photoshops brushes. now just paint on the layer above the texture while constantly using alt to pick up the various values and hues the texture gives you. Getting this kind of variety fast in your values and hues is real nice. Be careful that you don't stray to far from your already set base value or you will end up with a mess.
I hope this is helpful |
|
| Back to top |
|
seth1
member
Member #
Joined: 06 Jun 2004
Posts: 534
|
| Posted: Tue May 31, 2005 7:18 pm |
|
|
| Heh, looking wicked chris! Thanks for showing us how you paint! Right now the gun is looking a bit random, but probley look good when every thing is together.. |
|
| Back to top |
|
Godwin
member
Member #
Joined: 24 Apr 2002
Posts: 701
Location: Singapore
|
| Posted: Tue May 31, 2005 9:49 pm |
|
|
cool, been wanting to learn that stuff for some time, but didn't know the right way to go about it (I could probably get the look somehow-someway, but it'd be inefficient). Thanks! And I may mess around with presets to see what they actually do.
Oh yea the pic's looking great btw, only thing I could point out is how the mech's "chestplate" is a little confusing, probably due to the geometry, perhaps it could use some better definition 
_________________
Derelict Studios|Godwin's Space |
|
| Back to top |
|
Synnical
member
Member #
Joined: 28 May 2005
Posts: 177
Location: Toronto, Canada
|
| Posted: Wed Jun 01, 2005 11:25 am |
|
|
thanks for these tips, Chris! I realized that I still have much to learn about photoshop 
the robot is coming together nicely..looking forward to it. I am amazed that you have the patience to manage all those layers 
btw, I was wondering how you did the perspective lines above the robot, plus the gradient on them... I have seen it before but I still can't figure it out.  |
|
| Back to top |
|
Chris-Mayernik
member
Member #
Joined: 24 Feb 2004
Posts: 182
Location: USA
|
| Posted: Wed Jun 01, 2005 3:59 pm |
|
|
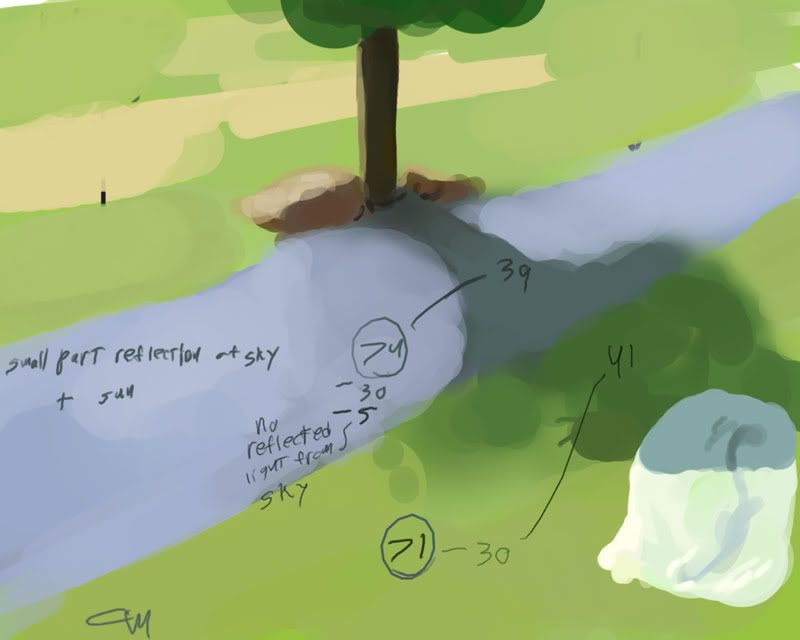
Remember what I said about controlling the darks? haha well I made a huge mistake with the shadows. They were much to dark before and did not take into accounnt the reflected light. If you look outside on a sunny day you will see that all the shadows are in order. When I say order I mean the tree shadow falling accross the grass and then onto the street. To shadow on the grass feels just right as the shadow on the street. now the thing to know is that they are equaly lowered in value according to the light. The only thing that will change the value is the reflectivity of the material it falls on, the reflected light being cast into the shadow, or another light source. Let me try to explain it better.
Here is a image I painted to explain what I mean.
now the tree is in the way at the angle we are viewing so the path below it is slightly lowered towards it's base value, which is the value it has when no reflection is effecting it.
This is a real quick sketch but I hope you understand what I am trying to say. Also I should mention that blacks and the dark darks should be used lightly. In a dark room at night with just a little light allowing you to see you will notice that any low base value objects such as dark blue pillow cases will be lowered in value and highered in saturation. Only if the pillow is 1 foot away from you and somehow is not recieving any light will you paint it black. most of the objects in the room will fall from 3 to 10 and then a couple 0 - 3 accents will be located only in places such as
- in between objects that are close together
- cracks such as below a door way into a closet.
-a object greatly covered from the light.
- an object with a low natural value. an object with a low natural value such as a black chair will have more dark accents because they come about easier with the already low value.
Even at 5 feet away I doubt you will ever see a black and as you look at things farther away the darks become lighter.
Now I'm just explaining what happens inside with little light. Try to imagine what its like outside with a great light source and lots of light bouncing around. Yea you won't find many dark darks.
ok I hope this helps. if you have any questions or want to prove that my thinking is wrong please go ahead.
 |
|
| Back to top |
|
Chris-Mayernik
member
Member #
Joined: 24 Feb 2004
Posts: 182
Location: USA
|
| Posted: Wed Jun 01, 2005 5:47 pm |
|
|
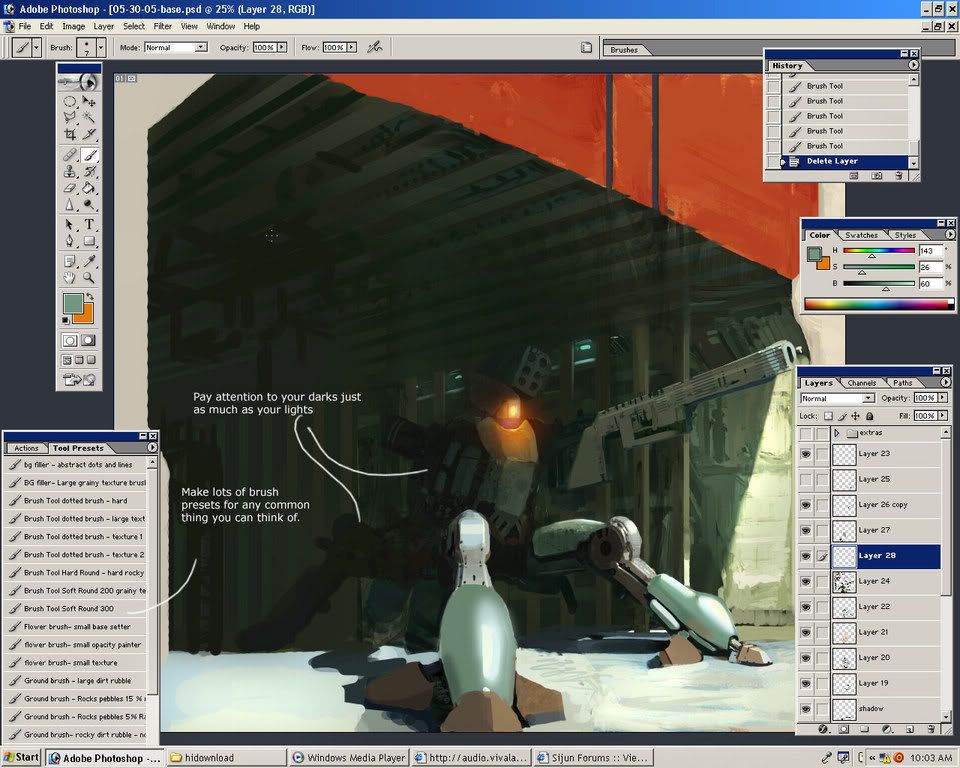
Slowly coming together. It's taken so long because I am getting to areas where I don't know exactly what to do, so I go outside and take notes then come back and see how to apply what I learned.
 |
|
| Back to top |
|
seth1
member
Member #
Joined: 06 Jun 2004
Posts: 534
|
| Posted: Wed Jun 01, 2005 11:31 pm |
|
|
| Looks wicked chris! What do those numbers mean on the shadow topic? How do you apply them to a painting... |
|
| Back to top |
|
mattgamer
junior member
Member #
Joined: 22 Jun 2005
Posts: 8
Location: Wyoming USA
|
| Posted: Wed Jun 22, 2005 8:37 pm |
|
|
wow, nice stuff Chris!!
i have learned much about the brushes/lighting/and textures.
keep up this stuff, you are an awesome teacher and i love all your work here and on DA.
God bless - i'll be watching always. |
|
| Back to top |
|
notic
member
Member #
Joined: 09 Apr 2001
Posts: 441
Location: Sweden
|
| Posted: Tue Nov 21, 2006 6:20 am |
|
|
Sorry for bringing up an old thread... but, did you finish the picture?
i would also like to know about those numbers 
i like threads like these, people sharing how they think when approaching a painting.. it freshes up one's own approach.
edit: oh! and just a thought that would enhance the scale.. put some people in there! |
|
| Back to top |
|
|


